

If I restore fountain pens, I don’t trust my eyes alone. A change of just 0.01–0.02 mm can affect nib flow and sizing, and a 0.05–0.10 mm fit error can stress an old section or feed.
Here’s the short version: if I want clean fit, safe assembly, and fewer cracked parts, I need the right measuring tools. This article covers 7 tools I’d use most often:
- Micrometer for very small thickness and outside diameter checks
- Calipers for diameter, length, and depth work
- Feeler gauges for tiny gaps like nib slit spacing (which you can check against a nib size calculator)
- Ruler for overall length and simple layout
- Thread gauge for matching thread pitch
- Depth gauge for cap, barrel, and cavity depth
- Loupe with a scale for close inspection and rough size checks
A few takeaways stand out fast:
- Calipers and a ruler handle most bench work
- Feeler gauges and a loupe help a lot with nib work
- Micrometers, thread gauges, and depth tools come in for tighter checks
- Even a 0.1–0.2 mm thread mismatch can damage vintage threads
- Basic feeler gauge sets often cost about $6–$15, while thread gauge sets often run about $10–$35
My Pen Repair Tools
sbb-itb-1dd4fe9
Quick Comparison
| Tool | What I use it for | Best for |
|---|---|---|
| Micrometer | Tiny thickness and outside diameter readings | Nib stock, feed diameter, barrel wall thickness |
| Calipers | Outside/inside diameter, length, depth | Section, barrel, cap, and general repair work |
| Feeler Gauges | Small gap checks | Nib slit, tine spacing, nib-to-feed clearance |
| Ruler | Longer measurements | Sac, cap, barrel, and pen length |
| Thread Gauge | Thread pitch check | Section, cap, and blind-cap threads |
| Depth Gauge | Recess and cavity depth | Inner cap depth, piston travel, sac cavity depth |
| Loupe with Scale | Close inspection with rough size reference | Tines, tipping, feed fins, and crack checks |
So if I had to keep this simple, I’d start with a digital caliper, a steel ruler, and a loupe from a tuning kit, then add the rest as repair jobs get tighter and more exact.
Why Measurement Matters in Fountain Pen Repair
In fountain pen repair, tiny changes can cause big problems.
A 0.01–0.02 mm shift in tine gap can take a nib from smooth and steady to common nib issues like skipping or gushing ink. Many experienced tuners look for a tip gap of about 0.035–0.040 mm to get wet, steady flow in steel nibs.
The same level of care applies to the section, feed, and barrel. If a replacement feed is 0.05–0.10 mm too large, it can crack a vintage section. If it's too small, it may lose proper ink contact. Section-to-barrel fit also matters. A loose fit can let the section rotate or leak. Too tight, and the barrel can split. Inner cap fit is just as touchy, since the inner cap needs to seal the nib without scraping the tines or feed.
Thread mismatch is one of the easiest ways to do lasting harm. Even a 0.1–0.2 mm thread pitch mismatch can cross-thread a section into a vintage barrel, strip material, or create stress that later turns into cracks. A thread gauge, used with calipers, helps you check before you force anything.
A standard ruler just isn't precise enough for nib or feed work. For most section and barrel measurements, use calipers. For very small thicknesses, use a micrometer. For tiny clearances, use feeler gauges. The quick comparison below shows which tool fits each job.
Quick Comparison of the 7 Measuring Tools
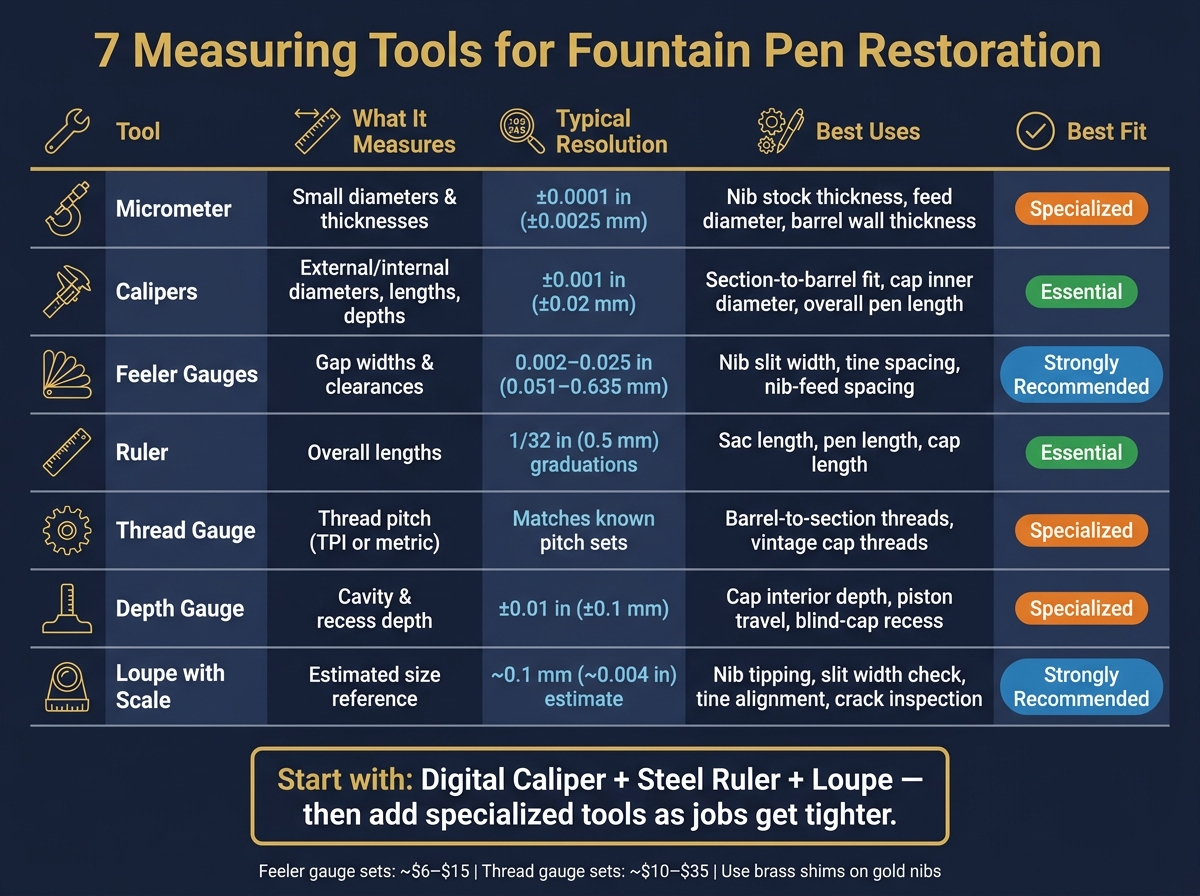
7 Measuring Tools for Fountain Pen Restoration: Quick Comparison Guide
Each tool handles a different job. This chart gives you a fast way to see what each one measures and where it fits in restoration. Imperial units come first, with metric in parentheses.
| Tool | Measures | Typical Resolution | Best Uses | Best Fit |
|---|---|---|---|---|
| Micrometer | Small diameters and thicknesses | ±0.0001 in (±0.0025 mm) | Nib stock thickness, feed diameter, barrel wall thickness near lever slots | Specialized |
| Calipers | External/internal diameters, lengths, depths | ±0.001 in (±0.02 mm) | Section-to-barrel fit, cap inner diameter, section diameter at the barrel joint, overall pen length | Essential |
| Feeler Gauges | Gap widths and clearances | 0.002–0.025 in (0.051–0.635 mm) blades | Nib slit width, tine spacing, cap-to-barrel clearance, nib-feed spacing | Strongly recommended |
| Ruler | Overall lengths | 1/16–1/32 in (1–0.5 mm) graduations | Sac length, pen length, cap length | Essential |
| Thread Gauge | Thread pitch (TPI or metric) | Matches known pitch sets; pitch varies by pen | Identifying barrel-to-section threads, matching vintage cap threads | Specialized |
| Depth Gauge | Cavity and recess depth | ±0.01 in (±0.1 mm) | Cap interior depth, piston travel, blind-cap recess, inner barrel shoulder | Specialized |
| Loupe with Measurement Reference | Estimated size reference | ~0.1 mm (≈0.004 in) estimate | Nib tipping size, slit width check, tine alignment, micro-crack inspection | Strongly recommended |
Use this as your quick guide before you get into each tool in detail.
For most basic measuring work, calipers and a ruler do most of the heavy lifting, especially when troubleshooting a pen that is not writing. If you're working on nibs, add feeler gauges and a loupe. Micrometers, thread gauges, and depth gauges come in when the job gets more specific.
One small caution matters here: steel feeler gauges can mark gold nibs. Brass shims are a safer choice for delicate flossing.
The tool-by-tool sections below show how each one works in practice.
1. Micrometer
When calipers get you close but not close enough, a micrometer gives you the finer reading. Use it for tiny outside diameters and thicknesses when calipers don’t have the precision you need. A 0–1 in outside micrometer reads to 0.001 in, and digital models can go down to 0.00005 in - about 10–20× tighter than most calipers.
For fountain pen work, a 0–1 in (0–25 mm) outside micrometer covers most nib, feed, section, and barrel-wall checks.
It’s especially handy when you need to:
- check feed diameter
- track thickness loss while thinning a nib
- measure barrel-wall thickness near lever slots or threads before sanding
Those numbers matter. They tell you if a part will fit the way it should and whether there’s still enough material left to work safely without pushing your luck and damaging the part.
Use the ratchet stop or friction thimble so you don’t squeeze the part too hard. Clean the anvils and the part first, then take readings at two or three points around the circumference to spot uneven wear.
A micrometer has limits, though. It won’t measure inside diameters, gaps, or overall length. For those jobs, reach for calipers, feeler gauges, or a ruler. For inside diameters, length checks, and most day-to-day measuring, calipers handle the broader range of work.
2. Calipers
Calipers are the main do-it-all measuring tool in pen restoration. They handle the numbers you check most often in repair work: diameters, lengths, and depths, all with one tool.
For most fountain pen jobs, a 6 in (150 mm) digital caliper is the sweet spot. It covers most section, barrel, and cap measurements without taking over a small bench. Good digital calipers usually read to 0.01 mm (0.0005 in) and stay accurate to about ±0.02–0.03 mm (±0.001 in), which is more than enough for pen work.
Each part of the caliper does its own job. The outer jaws measure section tenons and barrel or cap diameters. The inner jaws check bores and inner caps. The depth rod measures recesses and slot depths. If you're dealing with narrow gaps or slit measurements, switch to feeler gauges instead.
Digital calipers let you jump between inches and millimeters in a second, which is handy when you're working from mixed specs. Dial calipers are also a good pick if you don't want to deal with batteries, and the mechanical display is easy to scan at a glance.
Before you measure, zero the jaws and wipe the part clean. Use light pressure, especially on thin-walled caps and barrels that can flex if you squeeze too hard. On parts that aren't perfectly round, check more than one spot. If the gap is too small for calipers, the next tool is a feeler gauge.
3. Feeler Gauges
When calipers aren't precise enough, feeler gauges step in for the tiniest gaps between parts. The right reading is the thickest blade that slides through with light, even drag. The next thicker blade should not go through cleanly.
For fountain pen work, the sweet spot is about 0.001–0.004 in (around 0.025–0.10 mm). That's thin enough for nib slits and other small spaces. A basic automotive set usually does the job and often costs about $6–$15.
You can use feeler gauges to check slit width and tine spacing before and after an adjustment. On the feed side, a thin blade can probe the nib-to-feed interface or help clear dried ink and paper fibers from the slit and channel. They can also help with cap and section checks, like nib-to-inner-cap clearance or tiny gaps at section threads when you're tracking down leaks.
For delicate gold nibs, use brass shims instead of steel blades. Either way, start with a very thin blade, keep it flat and lined up with the slit, and never force it into a gap that won't take it. Store the set folded and dry. Stainless blades resist rust better than plain steel. For longer measurements, switch to a ruler.
4. Ruler
For longer measurements, switch to a ruler. It’s the right tool for checking overall length and layout on parts like the pen, cap, barrel, and section. It also helps with spacing on bands or clips. Those numbers let you check proportions before you move on to calipers or a micrometer.
A 6 in (150 mm) stainless steel ruler with inch/mm markings is the practical pick. Its 1/64 in and 0.5 mm graduations work well for layout, but not for fit-critical work.
Use it during assessment to judge crack length and mark cut lines before removing material.
A clear plastic ruler is handy when you need to line up cap bands and clips without scratching celluloid or ebonite.
Start at the zero mark, not the edge of the ruler, and read straight down to avoid parallax.
For thread matching, the next step is a thread gauge.
5. Thread Gauge
A thread gauge tells you the pitch of a threaded part - in plain English, how tight or spread out the spiral is. It comes with thin metal leaves, and each leaf is stamped with a pitch value. You test a leaf against the threads and look for a clean fit with no gaps and no wobble. If your calipers confirm the size but the threads still won’t mate, this is usually the next tool to grab.
In pen restoration, this matters most on cap threads, section threads, and blind-cap threads. These are the parts that decide how a pen closes, seals, and stays together while you write. If the thread match is off, parts can bind, cross-thread, or sit too loose.
Use calipers alongside the gauge to check both pitch and diameter. The gauge checks pitch. Calipers check diameter. Put those two numbers together, and you can match or reproduce the thread with much better accuracy.
When picking a set, look for:
- Both metric and TPI leaves
- Fine-pitch coverage
- Hardened steel
- Etched markings
6. Depth Gauge
A depth gauge measures how far down a cavity goes from a reference surface. In a pen, that links fit, clearance, and travel inside the barrel or cap. Calipers and rulers are fine for length, width, and diameter on exposed surfaces. Depth measurement handles the part you can't judge at a glance: whether parts seat all the way and whether they clear each other once assembled.
In day-to-day repair work, use depth to check inner cap depth, nib-and-feed seating depth, sac cavity depth, and piston stroke. Those readings can save you from a lot of guesswork.
For most repairs, a caliper depth rod does the job. A depth micrometer makes sense if you do frequent piston work or need machining-level precision. A good target is about 0.01 mm (0.0005 in) resolution and ±0.02 mm (±0.001 in) accuracy. If you do precision machining on a regular basis or rebuild and lubricate fountain pen pistons often, a dedicated depth micrometer with 0.001 in resolution is a smart step up.
Technique matters here. Keep the base flat and square to the opening. If it tilts even a little, the cavity will read deeper than it is. It also helps to take two or three readings and average them, especially with vintage pens where surfaces may not be perfectly even. For a quick visual check, pair the measurement with a loupe.
7. Loupe with Measurement Reference
A measuring loupe combines magnification with a reticle or etched scale. It’s handy for inspection and rough sizing. It’s not a precision measuring tool like a micrometer, but it works well as a fast check before you move to something more exact.
For fountain pen work, a 10x–15x loupe is usually the sweet spot. Many measuring loupes come with a 0.1 mm metric scale, and some also include 0.005 in divisions. That gives you a quick way to check what you’re seeing before you switch to a more exact tool.
You can use it to inspect:
- nib tines
- tipping
- feed fins
- thread damage
Under magnification, small problems are much easier to spot. A misaligned tine, a chipped tip, or a stress crack near the breather hole can slip past the naked eye. The reticle gives you a rough sense of size, which helps when you're deciding if a repair makes sense or if you should consult a fountain pen buying checklist for a replacement. Inspect first, measure second.
A practical workflow is pretty simple. Make a few test strokes on paper, then check the nib under the loupe to find the exact area causing scratchiness. A scratch in one direction often means one tine sits higher than the other. Make a small correction, then check again under the loupe before testing one more time. That back-and-forth matters, especially with fine or extra-fine nibs, where it’s easy to go a little too far.
For best results, clear optics and a sharp reticle matter more than pushing magnification higher. At 10x or 15x, small surface marks can look worse than they are, so use the reticle for rough sizing only. For exact dimensions, confirm with calipers or a micrometer.
Buying and Sourcing Tips for These Tools
Pick accuracy and consistency over extra features. A basic caliper or micrometer that stays in calibration and gives the same reading each time is worth more than a cheaper tool with lots of modes, loose jaws, or markings that wear off. For pen work, tiny tolerances matter, so steady performance beats novelty every time.
Clear markings also make a big difference. Look for laser-etched or engraved graduations, a stable digital display, and about ±0.001 in (±0.02 mm) accuracy on a 6-inch caliper. For rulers, etched graduations are the better bet because they're easier to read and hold up better with use.
Stick to the size range you'll actually use. In most cases, 6-inch tools cover the bulk of fountain pen work. For feeler gauges, a set that covers about 0.02 mm to 1.00 mm with 20 to 30 blades will handle most nib slit and tine spacing checks. Thread pitch gauges for pen caps and sections are usually low-cost too. Workshop-grade sets often fall in the $10 to $35 range and are usually enough for essential pen accessories for general repair.
Go with stainless steel when you can. Ink, water, and cleaning fluids can corrode or warp lower-grade tools. It also helps to test any new tool on a non-collectible item first and check that it zeros against a known reference. That small habit can save you from bad readings later.
Conclusion
These seven tools - micrometer, calipers, feeler gauges, ruler, thread gauge, depth gauge, and a loupe with measurement reference - each handle a different part of pen restoration. Used together, they let you check nib thickness and tine gap, feed seating depth, barrel and section diameters, cap clearance, and thread compatibility. That shifts repair work from guesswork to a controlled, repeatable process.
They also help protect fit, alignment, and finish. Measuring first helps preserve original material because you can confirm fit before removing or changing anything. A depth gauge can also confirm safe inner-cap clearance. In plain terms, you work with the pen’s original fit instead of fighting it.
A narrow, controlled tine gap can support steadier ink flow, and the right feed depth helps keep the ink channel aligned.
In day-to-day work, the best setup is simple: start with a digital caliper, a steel ruler, and a loupe. Then add more specialized tools as your projects call for them. Record dimensions before disassembly, check fit before forcing any part, and verify clearance before closing a cap. Following these steps alongside regular fountain pen maintenance ensures your tools remain in peak condition.
FAQs
Which measuring tools should I buy first?
If you’re getting into pen restoration, start with a small kit you’ll use right away:
- 10x jeweler’s loupe
- brass shims
- smooth testing paper
A 10x jeweler’s loupe lets you check tine alignment up close. Brass shims help clear debris from between the tines. And smooth testing paper gives you a clean way to check ink flow and nib feel after you make an adjustment.
If you want an easy shortcut, Fountain Pen Revolution also sells a pre-assembled Tuning/Cleaning Kit with these basics.
When should I use a micrometer instead of calipers?
Use a micrometer when calipers just aren’t precise enough. Calipers are great for general measuring tasks, like checking a barrel’s inside diameter so you can pick the right sac size.
But when you’re working with parts that need tighter tolerances and more exact readings, a micrometer is the better tool.
How do I measure a nib slit without damaging it?
Use a 10× to 20× jeweler’s loupe under bright light to inspect the slit between the tines. You’re looking for a thin, even gap from one end to the other.
You can also do the daylight test: hold the dry nib up to the light and check for a steady, hairline sliver of light.
For a tactile check, gently slide a 0.001–0.002 inch brass shim between the tines. The goal is simple: feel for even resistance on both sides - never force it.