

If your fountain pen converter won’t fill, the cause is usually one of 7 things: a loose fit, a small air leak, a blocked feed, a dry piston seal, a bad filling angle, low ink in the bottle, or residue inside the converter.
I’d start with the simplest checks first: make sure the converter fits the pen, test it with room-temperature water, and keep the nib and feed fully under the surface while filling. In many cases, that fixes the problem without tools, parts, or extra cost.
Here’s the whole article in one quick scan:
- Fix 1: Reseat a loose converter
- Fix 2: Check for small air leaks
- Fix 3: Flush a blocked feed
- Fix 4: Free up a dry piston seal
- Fix 5: Correct the filling angle and depth
- Fix 6: Deal with low ink in the bottle
- Fix 7: Clean residue from inside the converter
A good rule: if the same fill fails 3 times in a row, it’s often time to replace the converter.
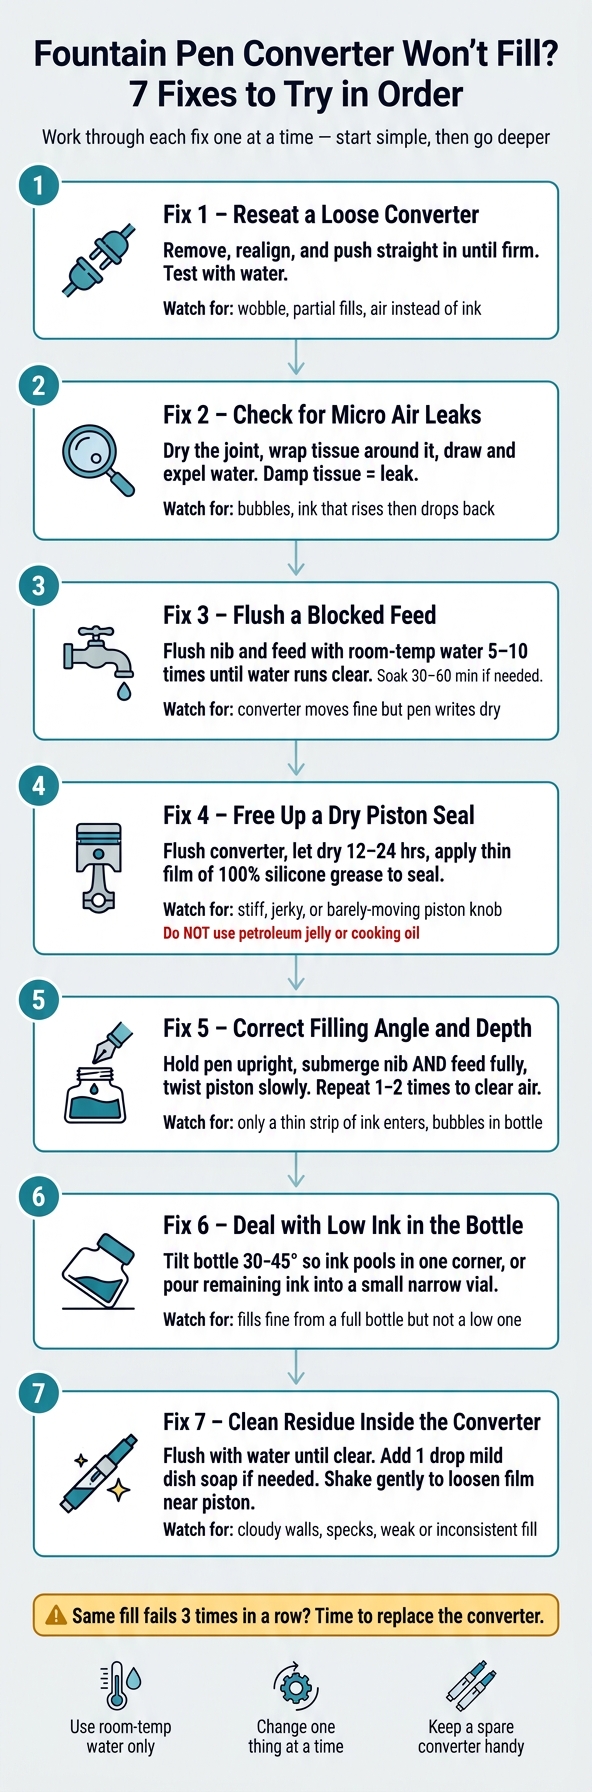
Fountain Pen Converter Won't Fill? 7 Fixes to Try in Order
The “Bubble Test” That Explains Most Converter Ink Flow Problems
sbb-itb-1dd4fe9
Quick Comparison
| Problem | What you’ll notice | First thing I’d do |
|---|---|---|
| Loose converter | Air instead of ink, wobble at the joint | Push the converter in straight and test with water |
| Small air leak | Bubbles, fill starts then drops back | Dry the joint, test with tissue, reseat or replace |
| Blocked feed | Converter moves, but pen writes dry | Flush the nib and feed with room-temperature water or pen flush |
| Dry piston seal | Knob feels stiff or jerky | Flush the converter and add a thin film of silicone grease |
| Bad angle or shallow dip | Only a little ink enters | Keep nib and feed fully submerged and turn slowly |
| Low bottle level | Works from a full bottle, not a low one | Tilt the bottle or move ink to a small vial |
| Residue in converter | Cloudy walls, specks, weak fill | Flush with water; use a drop of mild dish soap if needed |
In short: I’d go fit, leak, flow, seal, angle, level, then residue - one step at a time so you can spot what’s wrong fast.
What to Check Before You Start
Start with a few basic checks. They can rule out the usual culprits before you spend time on a deeper fix.
Confirm the Converter Fits the Pen
Converters are not universal. Make sure yours matches the pen’s connector type, then give it a gentle tug and twist.
If it wobbles, tilts, or slides off too easily, it may not be seated all the way. Or it may be the wrong converter for that pen. When the fit is off, air gets in where ink should be. And that can look a lot like a failed converter.
Check the pen’s product listing, such as the Pilot Con-40 Twist Converter page, or manual to confirm compatibility before you do anything else.
Test with Room-Temperature Water First
Before you go near ink, test the pen with clean room-temperature water.
Fill a small cup, submerge the nib and feed fully, then draw in and expel the water. Watch closely as you do it. Large bubbles around the converter joint can point to an air leak. If little or no water enters even after a full stroke, the issue may be a blocked feed or a dry, stuck seal.
Protect the Work Area
Put a few paper towels or a washable cloth on the table before you start. Keep water nearby for rinsing.
It’s a small step, but it saves a mess later.
Avoid Hot Water and Sharp Tools
Stick to room-temperature water. Hot water can damage plastic feeds and piston seals.
Skip sharp tools too. Needles, metal picks, and similar items can crack thin plastic walls or scratch seals. That often turns a small issue into a bigger one. If something feels stuck, soak it in room-temperature water and use gentle twisting instead of force.
Work in Good Lighting
Set up a bright desk lamp so the light hits the converter at a slight angle. If your converter is clear or translucent, this makes it much easier to see what’s going on inside.
Good lighting helps you spot:
- cracks
- bubbles
- residue
- gaps at the converter joint
It also helps you watch how the water or ink moves through the converter, which can make the problem easier to pin down.
If these checks don’t fix it, move to Fix 1: reseat a loose converter.
1. Reseat a Loose Converter
Start here. A loose converter can look like an ink, feed, or nib issue when the fit is the thing causing trouble.
Likely Symptom
A loose converter can pull in air, take in only a small amount of ink, or fill only partway. You might also notice bubbles with no ink rising. In some cases, the converter wobbles when you gently twist the piston knob.
Simple Home Check
Remove the converter and look closely at the converter collar for cracks, warping, or any misshapen spots. Then press it back onto the section and gently try to wiggle it side to side.
A properly seated converter should not wobble. If it shifts even a little, it may not be fully seated, or it may be the wrong fit for that pen.
Beginner-Safe Fix
Take the converter off completely. Then line it up straight with the section nipple and push it straight on with firm, even pressure until it stops.
After that, test it with room-temperature water. (This is also a good time to clean your fountain pen to ensure no dried ink is obstructing the flow.) If it fills in a steady way, the fit is doing its job. If that looks good, go ahead and fill with ink.
If it still pulls in air after reseating, move to Fix 2: check for micro air leaks.
When to Replace Parts
If the converter keeps popping off during normal use, or if the collar looks cracked or shows white stress marks, pushing it back on usually won’t solve it. And if more than one converter feels loose in the same pen, the problem may be wear on the pen’s section connector, not the converter itself.
2. Check for Micro Air Leaks
If reseating didn’t fix it, the next thing to check is a micro air leak. A converter can look fully in place and still let air slip in at the joint or seal. And once that happens, the vacuum breaks, so ink won’t rise the way it should.
Likely Symptom
The usual clue is bubbles instead of ink, or ink that starts to rise and then drops back down. That points to a seal problem, not a nib problem.
Simple Home Check
A simple way to test this at home is the dry tissue test. Fill the converter with room-temperature water, wipe the section and converter joint until they’re fully dry, then wrap a small piece of tissue around the joint and draw and expel water a few times. If the tissue gets damp, air is getting in.
You can also do a converter-only test. Remove the converter from the pen, submerge the open end in water, pull the piston to fill it, then hold it upright. If the water level drops or water drips from the mouth, the seal is leaking.
Beginner-Safe Fix
Check the converter under bright light for hairline cracks or warping. If you don’t see damage, seat it firmly again and repeat the water test.
If it still leaks after reseating, or if you spot cracks or seal failure, replace the converter.
When to Replace Parts
Replace the converter if it still leaks after reseating, or if you see cracks or seal failure. If two different converters show the same leak pattern in the same pen, the section nipple may be the issue. At that point, a repair expert or pen replacement is worth considering.
If the converter seals cleanly but still won’t fill, move to Fix 3: flush a blocked feed. Using a fountain pen cleaning kit can help clear stubborn clogs.
3. Flush a Blocked Feed
Likely Symptom
The converter moves smoothly, but barely any ink makes it to the nib. The pen might write for a few lines, then suddenly go dry.
Simple Home Check
Start by removing the converter and testing it on its own in a cup of clean water. If it draws in water and pushes it back out without trouble, the issue likely points to the feed.
You can also hold the nib and section under room-temperature running water for 15–20 seconds. Watch what comes out. If the water stays heavily tinted or the flow looks uneven, dried ink is still stuck in the feed.
If the converter works fine with water but the pen still won’t write, the blockage is in the feed or nib unit.
Beginner-Safe Fix
Fill a cup with about 2–4 oz (60–120 ml) of room-temperature water. Reattach the converter to the section, dip the nib into the water, and work the piston to pull water in and push it back out. Do this 5–10 times, until the water runs clear.
If the ink is more stubborn, soak the nib and section in clean water for 30–60 minutes first, then flush again. Sometimes that does the trick. If not, a bulb syringe can help move things along. Press the bulb syringe tip firmly against the section opening and force water through the feed.
After flushing, let the nib and section air-dry nib-down for several hours before you refill the pen with ink.
When to Replace Parts
If flushing and soaking still don’t bring the flow back, the feed may be damaged. At that point, replacing the nib-feed unit is usually the next practical move.
With lower-cost pens for beginners, replacing the nib unit - or even the whole pen - can cost less than spending more time trying to clear a badly blocked feed.
If the feed is clear and the converter still won’t draw, move to Fix 4: free up a dry piston seal.
4. Free Up a Dry Piston Seal
If flushing the feed didn't fix the problem, the piston seal may just be dry.
Likely Symptom
The converter feels stiff, jerky, or hard to turn. In some cases, it barely moves at all. You might also notice that it pulls in little water - or none - even when the feed and nib are clear.
Simple Home Check
Remove the converter and test it by itself. First, twist the piston up and down in the air. It should move with modest, steady pressure. If it sticks or binds, that's a strong clue.
Then place the open end in a cup of room-temperature water and try to draw water in. If the seal is dry, the pull often feels uneven, weak, or inconsistent.
Beginner-Safe Fix
Start by flushing the converter with room-temperature water 5–6 times, until the water runs clear. If dried ink won't budge, mix 1 drop of unscented dish soap into about 8–12 fl oz of water. Flush the converter several times with that mix, then rinse again with plain water to wash out any soap.
Skip hot water. It can warp plastic parts or affect rubber seals.
After that, expel the water, stand the converter upright, and let it air-dry for 12–24 hours. Once it's fully dry, retract the piston all the way and apply a thin film of 100% silicone grease to the seal with a toothpick or cotton swab.
Go light here. Too much grease can work its way into the ink reservoir. Cycle the piston up and down a few times to spread it around, then run one last water test.
Important: Do not use petroleum jelly, cooking oil, or any non-silicone lubricant.
When to Replace Parts
If the piston still slips at random or ink leaks past the seal after filling, the seal is probably damaged instead of just dry. At that point, replacing it with a new converter is the practical move.
If the converter fills and empties smoothly, move on to Fix 5.
5. Fix the Filling Angle and Depth
Likely Symptom
The converter knob turns and the piston moves as it should, but little or no ink goes into the converter. You may only see a thin strip of ink near the front while the rest of the chamber stays clear. If you notice bubbles in the bottle during filling, that usually points to the nib being too shallow in the ink or the ink level sitting too low.
Simple Home Check
The easiest thing to check first is dip depth. Fill a clear glass with room-temperature water and watch from the side. The entire nib should stay under the surface, and the feed should be below the waterline too.
Beginner-Safe Fix
Before you dip the pen, twist the piston all the way forward so the chamber is cleared of air. Then hold the pen upright or slightly nib-forward, submerge the nib fully, and twist the piston slowly. If you move too fast, you can trap bubbles and end up with only a partial fill.
Keep the nib under the surface, expel the ink, and draw it in again. Doing this 1–2 times often clears trapped air and gives you a fuller, steadier fill. After that, hold the pen nib-up and move the piston slightly so any trapped bubble shifts to the top, then back it off.
Wipe the nib and test the flow. If the bottle is almost empty and the nib can’t reach deep enough, tilt the bottle so the ink gathers in one corner, or pour the last bit into a smaller vial so the ink sits higher.
If the nib still can’t stay deep enough because the ink level is too low, move to Fix 6.
6. Add More Ink to the Bottle
Likely Symptom
If Fix 5 didn’t solve the issue, the bottle may just be too low for a clean fill. The converter ends up pulling mostly air, or you only see a thin film of ink inside it. Fills stay small and uneven, even though the same converter worked fine from a fuller bottle. Put simply, the nib can’t stay far enough below the ink surface.
Simple Home Check
Hold the pen in the normal filling position and look closely at where the ink surface meets the nib. If the nib is no longer fully submerged, the ink level is too shallow for a steady fill.
You can double-check this by filling from room-temperature water or from a bottle with more ink. If the pen fills normally there, the low ink level is the cause.
Beginner-Safe Fix
Tilt the bottle about 30–45° so the ink collects in one corner, then dip the nib into the deepest part.
If that still doesn’t do it, pour the remaining ink into a small, clean vial. This works because the ink sits deeper in a narrower container, which lets the nib reach it more easily. Sample vials with conical or pointed bottoms help a lot here, since they gather even a small amount of ink into a deeper pool.
You can also remove the converter from the pen, dip its open end straight into the pooled ink, and work the piston to fill it. After that, reattach the converter and turn the piston slightly so ink moves into the feed.
If bottle level isn’t the issue, move to Fix 7: remove residue inside the converter.
7. Remove Residue Inside the Converter
Likely Symptom
If the feed is clear, the seal is wet, and fit isn't the issue, residue is the last common cause. The piston moves, but only a small amount of ink comes in. Or you get a short column of ink that slips right back out as soon as you stop turning the knob.
You may also see cloudy ink, a light film, or tiny specks stuck to the converter walls. In some cases, the converter works fine on one fill and then fails on the next. That kind of back-and-forth usually points to residue that weakens the seal or traps air.
Simple Home Check
If the converter still fails after fit, leak, and seal checks, inspect it for residue. Remove the converter from the pen and hold it up to a bright light. Look for cloudy patches, ink rings, or discoloration.
If you see any of those, residue is the likely cause.
If the converter draws and expels water smoothly on its own but still fails when attached to the pen, the problem may be somewhere else. In that case, check the feed or fit again before blaming residue.
Beginner-Safe Fix
Flush the converter with room-temperature water until it runs clear. If residue is still there, run one cup of water mixed with one small drop of mild, unscented dish soap through the converter, then rinse until no suds remain.
If residue is stuck near the piston head, partially fill the converter with clean water, cover the open end with your finger, and shake it gently. That can loosen the film without risking damage.
Avoid putting toothpicks, needles, or any hard tool inside the converter. Even a tiny scratch can leave a rough spot that traps ink and air later.
When to Replace Parts
If it still under-fills after flushing, inspect the plastic closely. If the walls look cracked, cloudy, or rough, cleaning won't bring back a dependable seal. A gritty feel when you move the piston points the same way.
At that point, replacement is the next step. Replacement converters are usually low-cost and easy to find from U.S. parts retailers.
If cleaning doesn't bring back a full fill, use the quick troubleshooting table to narrow down the cause.
Quick Troubleshooting Table
Use this table to match each symptom with the fastest first fix.
| Symptom | Likely Cause | First Fix |
|---|---|---|
| Piston knob turns but no ink enters at all | Converter not fully seated in the section | Push the converter straight in until it feels snug and doesn’t wobble |
| Only a few drops draw in | Nib not deep enough in the bottle or wrong angle | Hold the pen upright, submerge the nib all the way, and turn the knob slowly |
| Bubbles appear around the nib while filling | Micro air leak at the converter and section joint | Wipe the joint dry and reseat the converter; if it still leaks, replace the converter |
| Converter fills, then drains back into the bottle | Dry or worn piston seal | Cycle the piston up and down several times in room-temperature water to re-wet the seal |
| Pen writes dry even though the converter looks full | Blocked or partly clogged feed | Flush several times with room-temperature water until it runs clear |
| Converter only partly fills when the bottle is low | Ink level too low to submerge the nib and feed | Add more ink or tilt the bottle so the nib and feed stay fully submerged |
| Converter looks cloudy or has visible film on the walls | Residue inside the converter | Flush again and again with room-temperature water; soak if residue remains |
If the same symptom keeps coming back after one or two tries, the converter may need to be replaced.
When a Replacement Makes More Sense
If the converter still won’t work after the seven fixes above, replacement is the fastest next move.
Signs the Converter Is Beyond a Simple Fix
At some point, it’s not worth fighting the part. Replace the converter if it’s cracked, warped, or still stiff after flushing with room-temperature water.
You should also stop troubleshooting if the same fill fails three times, even after using the right technique and cleaning the converter.
A simple test helps here: if the pen writes with a cartridge, but not with the converter, the converter is the issue.
When Replacing the Pen or Converter Is the Better Call
Replace just the converter when the pen body and section are still in good shape. But if a proper converter still won’t seat or make a seal, the pen itself is the better thing to replace.
Affordable Replacement Options for Beginners
Fountain Pen Revolution sells low-cost replacement converters, nibs, and beginner pens.
It also helps to keep a spare converter in your kit. That way, one failed part doesn’t bring your writing session to a halt.
Conclusion
These seven fixes deal with the usual reasons a converter won’t fill. They cover fit, air, flow, seal, angle, level, and residue - the issues that most often stop a converter from drawing ink. Start with the easiest check, then move to the more involved ones. Change one thing at a time so you can spot what’s causing the problem. If one fix doesn’t work, the next step is replacement.
If the converter still won’t draw ink, replace it with a spare converter and keep it nearby. That way, one bad part doesn’t bring your writing to a halt.
To stop the same issue from coming back, flush the converter on a regular basis, don’t leave ink sitting in it for long periods, and fill with the nib fully submerged. Good filling habits solve most converter issues before they start.
FAQs
How do I know if my converter is the wrong fit?
Check the point where the converter connects to the grip section. It should fit snugly, with no wobble, no gaps, and no looseness.
If the converter slips out with little effort, still feels loose after you press it in firmly, or doesn’t seal the way it should, it’s probably the wrong size or not a match for that pen. Check your pen’s manual or the manufacturer’s guidelines to confirm compatibility.
Can a converter work with water but fail with ink?
Yes. Ink is thicker than water, so it can stick to the converter chamber instead of flowing down to the feed.
If your converter pulls in water but not ink:
- Check whether the ink is clinging to the reservoir walls
- Make sure the converter is fully seated
- Flush the feed to clear dried ink or residue
When should I replace the converter?
Replace the converter if cleaning, reseating, and checking the fit don’t fix the ink flow problem.
Signs it needs replacing include:
- Visible cracks
- Leaks that continue after cleaning
- A piston or plunger that no longer moves smoothly
- Poor suction
- A converter that stays loose or wobbly even when firmly seated