

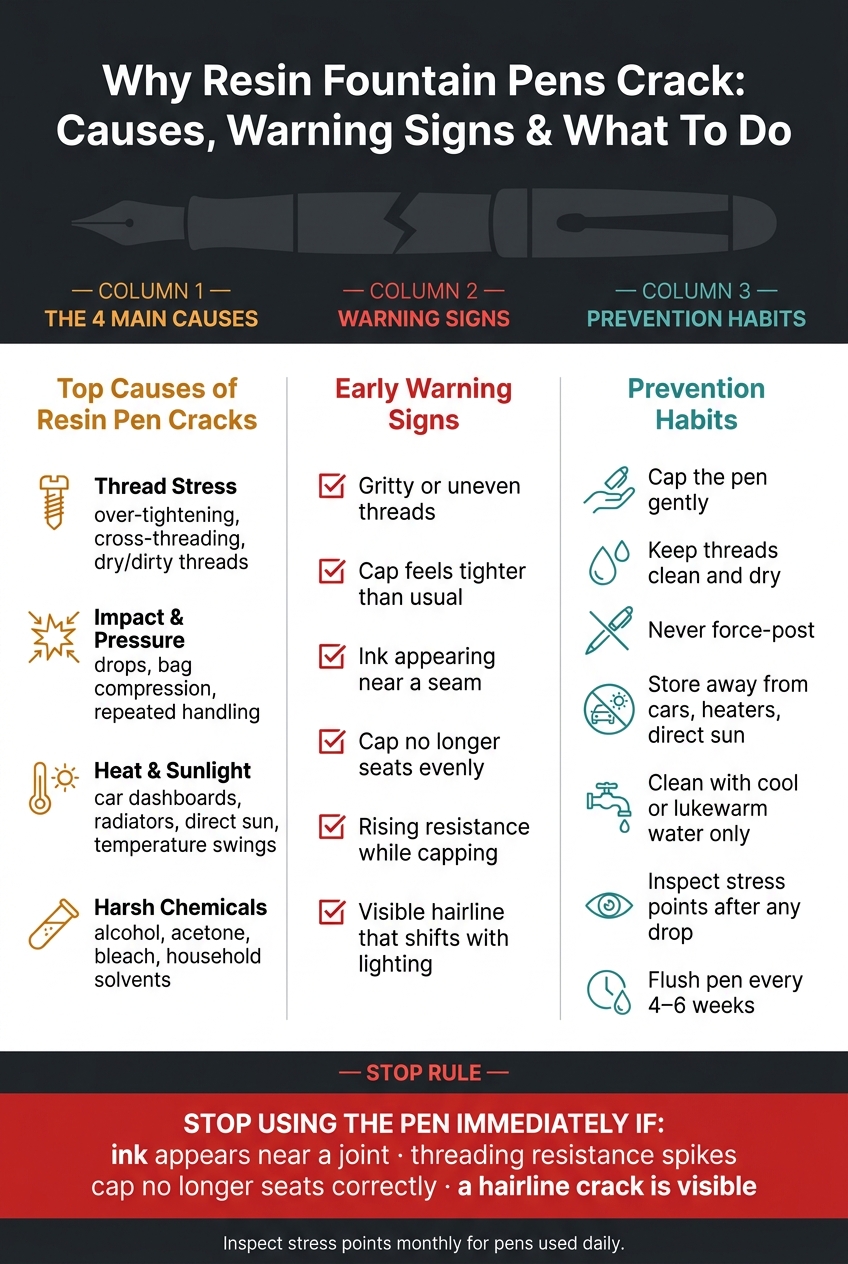
Most resin fountain pen cracks start from stress, not bad luck. In many cases, the trigger is one of four things: tight or misaligned threads, drops and pressure, heat, or harsh cleaners.
If I wanted to sum it up in plain English, I’d say this: small stress points turn into hairline cracks over time. A pen may look fine for weeks or months, then fail after one extra turn of the cap, one drop, or one hot day in a car. That’s why I’d watch for early signs like gritty threads, uneven capping, ink near a seam, or a cap that suddenly feels tighter than usual.
Here’s the short version:
- Thread stress is a top cause, especially with over-tightening, cross-threading, or dry threads
- Drops and bag pressure can leave a crack that doesn’t show up right away
- Heat and sunlight can warp resin and make weak spots split
- Alcohol, acetone, and bleach can damage resin surfaces and lead to crazing or cracking
- Ink usually exposes a crack rather than causing one
- Stop using the pen if you see seepage, a hairline, or a fit change
A few habits help a lot:
- Cap the pen gently
- Keep threads clean and maintain your pen's threads
- Don’t force posting
- Store the pen away from cars, heaters, and direct sun
- Use cool or lukewarm water for cleaning
- Inspect stress points after any drop
One useful rule: if the pen feels different, don’t ignore it. Many cracks start small, and catching one early can stop a split from getting worse.
The rest of the article explains where cracks tend to start, what usually causes them, and what I’d do the moment I spot one.
Why Resin Fountain Pens Crack: Causes, Signs & Fixes
Thread Stress: Over-Tightening, Dry Threads, and Poor Fit
How Thread Pressure Leads to Cracks
These cracks often start with a simple friction issue that slips under the radar. As you tighten the cap, thread force turns into direct pressure. Once the cap is fully seated, any extra turning pushes stress into a few weak spots: the cap lip, the barrel mouth, and the section threads. That’s usually where resin gives way first.
Cross-threading makes the problem much worse. When the cap and barrel meet on the wrong thread path, the load lands on just a few thread ridges instead of spreading around the full joint. One common red flag is a cap that seems to start fine, then suddenly gets tight after only part of a turn. If you keep forcing it, you can end up with a hairline crack that slowly grows each time you cap and uncap the pen.
Dry or dirty threads add more friction, which makes over-tightening easier to do without noticing it. Dust, dried ink, and lint can also stop the cap from seating evenly.
Warning Signs of a Poor Cap or Barrel Fit
A cap that doesn’t match the barrel well will usually give you hints before any damage shows up. The cap may start at an angle, bind halfway through the turn, stop too soon, or sit unevenly when closed. If it wobbles, the fit is off. Tightening harder won’t fix that. It just adds more stress.
Don’t force-post a pen that wasn’t made for posting. The cap can press against the barrel lip and crack it. Even when the cap threads seem fine, posting again and again on a barrel that doesn’t match can wear down or crack both parts.
How to Reduce Thread-Related Damage
One good habit is to line things up before you turn. Hold the cap straight against the barrel, rotate it a little counterclockwise until the thread start drops into place, then turn it clockwise with a light touch. If the cap doesn’t start smoothly, stop there. Check both parts in good light, then try again.
Clean and dry the threads with a fountain pen cleaning kit before closing the pen. You can use a small amount of silicone grease on joints that are made for it, but don’t use grease to cover up damage.
If the fit still feels off after cleaning and lining up the threads, the next thing to look at is impact stress from drops, pressure, and repeated handling.
sbb-itb-1dd4fe9
Impact and Handling Stress: Drops, Pressure, and Repeated Use
Drops and Hidden Impact Damage
Even if a pen’s threads are in good shape, a hard drop can still crack it. With a resin pen, the force usually lands at the first point of contact: the cap lip, finial, clip base, barrel end, or nib end.
The tricky part is that damage doesn’t always show up right away. A drop can leave behind a hairline crack that stays hidden at first, then shows itself later. That’s why the struck end is the first place to check, along with any nearby seams or threads. Inspect the pen before you use it again, not after the crack has had time to spread.
After any drop, look over the pen under a bright lamp or flashlight before putting it back into service. Turn the cap and barrel slowly in the light. Watch for fine lines, cloudy stress marks, chips, or anything that catches the light at an angle.
Pressure Inside Pockets and Bags
A pen tossed loose into a bag can get bent or squeezed by other hard items around it. This kind of slow, repeated pressure is easy to miss because there’s no single dramatic moment. The wear builds quietly, and over time that can lead to damage.
The fix is simple: carry the pen in a protective case or sleeve, and keep it away from keys, laptops, and other hard objects. A case won’t stop every hit, but it does cut down on the bending and compression that thin resin walls are prone to. That matters most for resin barrels and cap walls.
How to Handle a Cracked Pen Safely
If you find a crack near the section, cap lip, threads, or any other area that takes pressure, stop using the pen right away. The same goes if the pen shifts, leaks, feels sharp, or no longer fits as it should. Each capping or posting cycle can make the crack worse.
Don’t grab super glue or any other quick fix. Adhesives can seep into threads, change the fit, and make later repair harder. A better move is to place the pen in a padded case with no pressure on the cracked area, then photograph the damage under bright light before doing anything else. Those photos can help a manufacturer or pen restorer decide whether the part can be stabilized or if it needs replacement.
Heat, Sunlight, Ink, and Cleaning Chemicals
Heat, Sunlight, and Temperature Swings
Once you’ve ruled out thread fit, the next usual suspects are heat and chemicals.
Resin expands as it warms up and contracts as it cools down. That back-and-forth movement can put stress on threaded joints, seals, and any tiny crack that’s already there. A pen left on a car dashboard, near a radiator, or in front of a vent can end up cracked or warped. The cap and barrel can also loosen, and color can fade in direct sun.
Keep resin pens away from high heat, freezing cold, and direct sunlight. In many cases, temperature stress weakens the resin first, then a hidden crack shows up later during normal use.
Skip hot tap water, boiling water, hair dryers, and heat guns. They can soften one area unevenly and change the shape of the cap, section, or sealing surfaces. Use cool or lukewarm water instead, and let parts return to room temperature before cleaning, putting the pen back together, or checking the fit.
How Ink and Cleaners Expose Damage
If a pen is already under stress, ink and cleaners usually make the damage easier to spot rather than causing it in the first place.
Ink does not usually crack resin. What it often does is reveal a crack that was already there. It can seep through a hairline opening, stain the area around it, or settle into threads and make the flaw more obvious. If ink keeps showing up again after cleaning, that usually points to a failed seal or a crack.
Stay away from alcohol, acetone, bleach, and other household solvents. They can dull resin, cause crazing, change the color, or lead to cracking. Stick with water-based cleaning.
Safer Cleaning and Storage Habits
For routine cleaning, use lukewarm water. Legacy Pen House recommends flushing a regularly used pen every 4–6 weeks and any time you switch ink colors. If there’s residue, use a mild mix of water and unscented dish soap or a dedicated fountain pen cleaning solution. Rinse well, then dry threaded areas before you reassemble the pen.
A few simple habits go a long way:
- Store pens away from windowsills, cars, and heaters
- Clean with water only for normal care
- Stop using the pen if ink keeps coming back to the same seam
That’s usually the difference between a pen that stays stable and one that slowly gets worse.
Jinhao 992: A Remedy For The Barrel Cracking Issue
Inspection and Damage Limitation
Once a pen has been stressed, inspection is the fastest way to keep a small flaw from turning into a bigger problem.
How to Inspect a Pen for Early Cracking
After stress, heat, or a drop, inspect the pen before the crack spreads. Remove the cap and any cartridge or converter. Then wipe away loose ink so you can clearly spot any new seepage.
Check each part under angled light and rotate the pen slowly. You’re looking for lines that appear or disappear as the pen turns, ink staining along a seam, or dried ink or grit caught in the threads. Those little signs can tell you a lot.
Go area by area:
- Cap lip
- Barrel mouth
- Threads on both the cap and barrel
- Section
- Any trim or clip openings
- The finial
Pay close attention to thin areas, since that’s where stress tends to build up. If the threading feels gritty or the cap no longer seats evenly, that points to damage, not normal wear.
If you spot any of those warning signs, stop using the pen and move to damage control.
Use the checklist below to tell the difference between harmless wear and active cracking.
| Observation | What it might mean | What to do |
|---|---|---|
| Ink at a section seam or thread | Structural crack or failed threaded joint | Empty, clean, and stop normal use |
| Cap feels different or no longer seats evenly | Distorted or cracked cap lip/barrel mouth | Don't force it; inspect under bright light |
| Rising resistance while capping | Crack, distortion, or dried ink | Stop tightening and assess |
| Visible line that shifts with lighting | Possible hairline crack, especially with seepage | Isolate the pen and avoid further stress |
When to Stop Using the Pen
Stop using the pen at once if ink appears near a threaded joint, if threading resistance suddenly goes up, or if the cap no longer seats in its usual position. A crack around the section or cap seal is also a clear stop sign.
Then empty the ink source and clean the exposed parts before storage. Remove the ink source, place the pen on an absorbent, nonabrasive surface, rinse accessible parts with cool or lukewarm water, and dry the exterior gently. If putting the pen back together would strain the crack, store the parts separately.
Do not leave ink in a cracked pen.
It also helps to photograph the damage and note when the fit or leakage first changed. That gives you a clear record if you need to contact the manufacturer or a qualified pen restorer.
Key Steps for Prevention
Small cracks get worse under continued stress. Tighten gently, keep threads clean, avoid force, and protect the pen from drops and heat. Clean with water only.
For any pen you carry every day, inspect the main stress points once a month and any time the fit or ink behavior changes.
FAQs
Can a small crack get worse over time?
Yes. A small resin crack can get worse over time, especially in high-stress spots like section threads or the barrel mouth.
Regular use, heat, built-up stress, a poor fit, and repeated over-tightening can all make the crack spread. And even after a repair, the problem can keep coming back if the pen body itself is cracked - not just the seals.
What should I do right after dropping a resin pen?
Inspect the body, threads, nib, and feed right away for cracks, warping, leaks, or parts that have shifted.
If the pen feels scratchy or the ink flow turns uneven, stop using it so you don't make the damage worse. If the cracks are extensive, replacement is often more practical than repair.
How can I tell if a cap fit problem is causing stress?
Check for resistance or stiffness as you thread the cap on. If it doesn't sit the way it should, feels loose, or goes on with a rough, scratchy feel, that may point to wear or warping.
Under bright light, inspect the cap lip and threads for hairline cracks, stress marks, or tiny web-like fractures. If you see ink inside the cap even though the barrel is clean, that's another sign the fit or seal may be off.