

If an eyedropper pen leaks at the barrel-section joint, the fix is usually simple: replace the worn o-ring, add a thin layer of silicone grease, and test with water before ink.
I’d handle it in five steps: check for leak signs, remove the old ring, measure the size, install the new ring carefully, and run a 15–60 minute water test. In many cases, leaks come from a ring that is flat, cracked, swollen, loose, twisted, or pinched.
Here’s the short version:
- Leak at the threads or joint: often points to the o-ring or thread seal
- Ink in the cap: can mean poor sealing or burping
- Best measuring tool: digital calipers
- Common materials: silicone, nitrile, and EPDM
- Key size checks: inside diameter (ID) and cross section (CS)
- Water test fill level: about 2/3 to 3/4 full
- Test time: 15 to 60 minutes
- Burping tip: keep the barrel more than half full to leave less air inside
A quick note before I start: I’d use cool water, paper towels, and a blunt plastic tool or fingernail. I would not use hot water or harsh solvents, since those can cause more problems than they solve.
Bottom line: if silicone grease no longer stops the leak, replacing the o-ring is the next step.
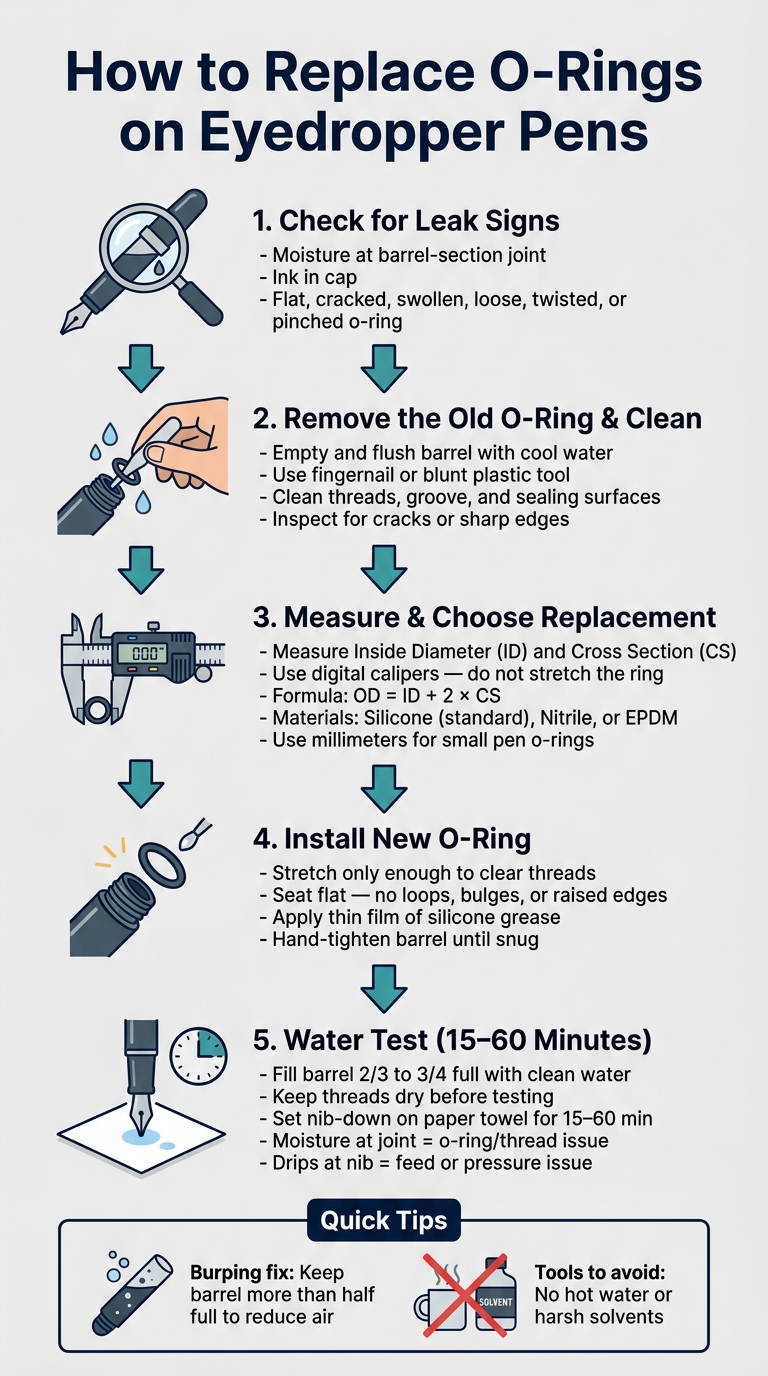
How to Replace O-Rings on Eyedropper Pens: 5-Step Visual Guide
How to fix a leaky eyedropper fountain pen.
sbb-itb-1dd4fe9
Remove the old o-ring and clean the sealing area
First, empty the pen and flush the barrel with cool water or a fountain pen cleaning solution. Then unscrew the barrel from the section and remove any cartridge or converter. Dry both parts all the way before you move on.
Disassemble the pen and locate the o-ring
On most eyedropper pens, the o-ring sits at the base of the section threads, right where the barrel meets the section. Gently lift off the old o-ring with a fingernail or a blunt plastic tool. Go easy here. You don't want to nick the pen while prying it loose.
Clean the threads, groove, and sealing surfaces
With the old o-ring removed, clean the threads, the groove, and the sealing surfaces to get rid of dried ink and old grease. A clean sealing area gives the new o-ring a better fit and helps stop leaks.
As you clean, check the area for cracks, rough spots, or sharp edges that might cut the new o-ring.
Once the sealing area is clean, measure the old o-ring so you can match the replacement size.
Measure the o-ring and choose the right replacement
Match the new o-ring to the old ring’s inside diameter (ID) and cross section (CS). That’s what helps it seal well without making the barrel so tight that it’s hard to close.
How to measure ID, cross section, and outer diameter
Use digital calipers for this job. Lay the old o-ring flat and measure it without stretching it. If you pull on it, even a little, the ID and CS can come out wrong.
For small fountain pen o-rings, millimeters are usually easier to use than inches. If the old ring looks flattened or misshapen, take measurements at a few spots and use the largest reading that stays consistent. You can also work out the outside diameter with OD = ID + 2 × CS.
How to match size and material for fountain pen ink
If the original o-ring is missing, measure the section groove instead. Then pick a replacement with an ID that’s slightly smaller than that diameter so it stays put.
Silicone is the standard choice, and nitrile and EPDM also work with fountain pen ink.
With the size matched, move on to installation.
Install the new o-ring without twisting or cutting it
Once you have the right size, the next part is all about care. Even a properly sized o-ring can fail if it gets twisted, pinched, or nicked during installation.
Seat the ring evenly
Stretch the o-ring only enough to get it past the threads, then lower it into the groove. Use your fingertips or a smooth plastic tool to guide it into place.
Make sure the ring sits flat. You don’t want to see loops, bulges, or any part riding up out of the groove. If something looks off, take it off and start over. It’s a small step, but it can save you from a leak later.
Apply silicone grease and reassemble the pen
Apply a thin film of silicone grease before reassembly. Then thread the barrel on by hand until snug.
Before you fill the pen with ink, test the seal first. That quick check can help you catch a bad fit before it turns into a mess.
Test the seal after reassembly and fix leaks
After reassembly, run a water test before adding ink. It only takes 15–60 minutes, and it can save you from filling the pen only to find a leak later.
How to run a water leak test
Fill the barrel two-thirds to three-quarters full with clean water. Keep the threads dry. That way, if you spot moisture later, you’ll have a clearer clue that water is coming from a leak.
Screw the section back on, dry the outside of the pen all the way as part of your fountain pen maintenance, then set it nib-down on a paper towel for 15–60 minutes. After that, check the barrel-section joint and the nib area for any moisture.
Here’s how to read what you see:
- Moisture at the joint usually means an o-ring or thread seal problem.
- Drips at the nib usually point to a feed or pressure problem, which can lead to your fountain pen not writing correctly.
How to troubleshoot leaks, burping, and poor sealing
If moisture shows up, start with the o-ring and then check the parts around it. When the paper towel shows moisture at the joint, common causes include the wrong ring size, a twisted or pinched ring, too little grease, damaged threads, or a crack in the section or barrel. Look over both parts closely under good light.
Burping is ink spitting from the nib as air in the barrel warms and expands. That’s different from a joint leak. Keeping the barrel more than half full leaves less air inside, which helps cut down on burping.
Replace any ring that is nicked, cut, or pinched.
FAQs
How do I know if the leak is from the o-ring?
Check the connection between the grip section and barrel. When an O-ring starts to fail, it often looks flattened or slips out of place. That can let air in and allow ink to seep out. One common clue is ink inside the cap or on the grip, even though the outside of the barrel still looks clean.
To check, wrap a paper towel around the section-barrel joint. If the towel gets damp, the leak is usually coming from the seal, not from a crack in the pen body.
What if I can’t measure the old o-ring?
If you can’t measure the old O-ring, start with a standard size for a known pen model. For example, the Platinum Preppy often uses an O-ring with a 7.5 mm inner diameter and 9.2 mm outer diameter.
If you don’t have exact measurements, use calipers to measure the groove where the O-ring sits. From there, you may need to test a couple of nearby sizes until you get a snug, leak-free fit that still allows the barrel to tighten all the way.
Can I use the pen right after the water test?
No. First, make sure the seal is secure by leaving the barrel on a paper towel for 24 hours.
If no ink appears after that, you can fill the pen and use it.
If you see any ink during or after the test, reapply silicone grease, reassemble the pen, and test it again.