
Keeping your pens in top condition doesn’t require expensive tools or professional services. With a few common household items, you can clean, maintain, and even make minor repairs to your pens. Here’s the gist:
- Clean regularly: Use tools like bulb syringes, mild dish soap, and microfiber cloths to flush and polish your pen.
- Repurpose household items: Glass jars, cotton swabs, and toothbrushes work great for soaking and cleaning hard-to-reach areas.
- Handle repairs carefully: For disassembly, use rubber grips and apply gentle heat if needed. For nib adjustments, brass shims and a jeweler’s loupe are essential.
- Know when to stop: If clogs persist or nibs are damaged, it’s best to consult a professional to avoid further harm.
How to Clean and Maintain A Fountain Pen - Cartridge, Converter, Piston and Vacuum Fillers
Household Cleaning Tools You Can Use for Pen Care
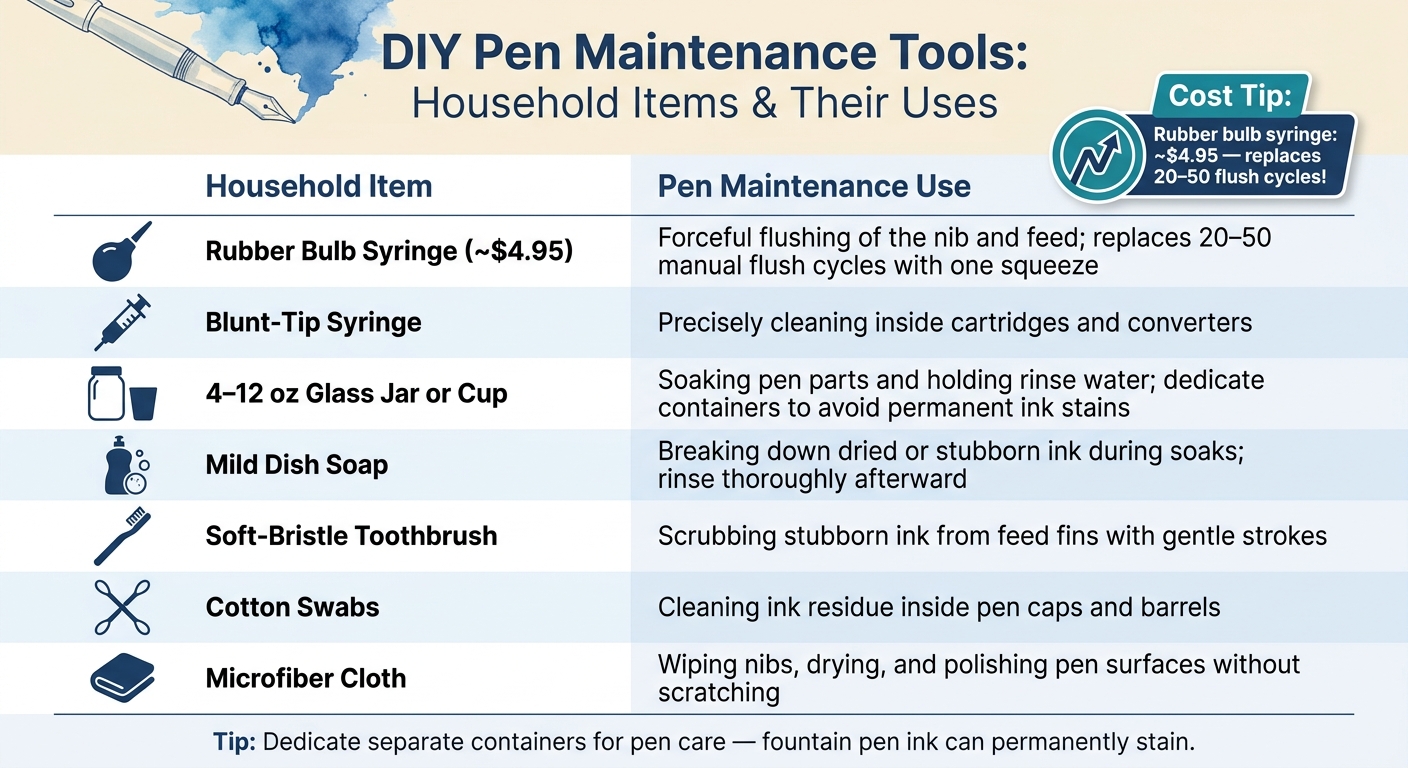
DIY Pen Maintenance Tools: Household Items & Their Uses
You might be surprised to learn that many everyday household items work perfectly for cleaning your fountain pen.
Tools for Flushing and Soaking
The rubber bulb syringe (also called a nasal aspirator) is hands down one of the most effective tools for cleaning fountain pens. At around $4.95, this simple tool can replace 20–50 manual flush cycles with just one squeeze.
"Flushing your cartridge/converter fountain pen with a bulb syringe is easily the single best trick to improve your fountain pen cleaning experience." - Brian Goulet, Founder, The Goulet Pen Company
To use it, press water through the pen's feed for about four seconds, then release the bulb to let it reinflate. Repeat this process until the water runs clear. Rubber syringes are preferred over plastic ones because they create a tighter, more effective seal against the pen's internal section. Just remember to squeeze from the top to prevent damage to the bulb's seams.
For soaking nibs or feeds, a clean 4–12 oz glass jar or drinking cup works well. However, it’s best to dedicate specific containers for this purpose since fountain pen ink can leave permanent stains. Adding a few drops of mild dish soap to the soaking water can help loosen dried or stubborn ink. Be sure to rinse thoroughly with plain water afterward to remove any soap residue.
Soft Materials for Wiping and Polishing
Once you’ve flushed your pen, it’s important to dry and polish it properly. Microfiber cloths are ideal for this step. They’re gentle, lint-free, and won’t leave behind fibers on the nib or scratch delicate surfaces like metal or resin.
If you don’t have a microfiber cloth handy, plain paper towels can absorb excess water from the feed, but avoid using them on polished surfaces as they can cause scratches. For cleaning ink stains on the exterior, a slightly damp microfiber cloth usually does the trick. Stay away from abrasive materials like rough paper or coarse cotton rags, which can damage your pen’s finish.
Tools for Cleaning Hard-to-Reach Areas
Sometimes, ink finds its way into the tightest spots, but a few simple tools can help:
- A soft-bristle toothbrush is perfect for scrubbing ink from feed fins. Use gentle strokes and let the water do most of the work.
- Cotton swabs are great for cleaning inside pen caps and barrels, where ink residue often builds up unnoticed.
- A blunt-tip syringe allows you to precisely direct water into narrow cartridges and converters for a thorough clean.
Here’s a quick overview of household items and their uses:
| Household Item | Pen Maintenance Use |
|---|---|
| Rubber bulb syringe | Forceful flushing of the nib and feed |
| Blunt-tip syringe | Cleaning cartridges and converters |
| 4–12 oz glass jar/cup | Soaking pen parts and holding rinse water |
| Mild dish soap | Breaking down dried or stubborn ink |
| Soft-bristle toothbrush | Scrubbing stubborn ink from feed fins |
| Cotton swabs | Cleaning inside caps and barrels |
| Microfiber cloth | Wiping nibs and polishing pen surfaces |
Now that your pen is clean and fresh, the next section will guide you through simple repair tools to keep it in top shape.
DIY Tools for Basic Repairs and Adjustments
You don’t need to be a professional to tackle basic pen repairs. With just a few tools and some care, you can handle many adjustments on your own. Here’s a look at the essential tools you'll need to safely disassemble and maintain your pen.
Simple Tools for Disassembly
Disassembling a pen can be tricky, especially since the barrel is easy to damage. A rubber gripper square - a 6-inch rubber-coated fabric square - gives you a firm grip on slippery sections, reducing the risk of crushing or slipping. For pens with screw-in cap jewels, like some Parker models, a No. 5.5 white rubber stopper is another great option. Its high-friction surface helps you safely unscrew these parts.
For stubborn threaded joints, applying gentle heat can work wonders. A craft embossing gun is ideal because you can control the heat by adjusting its distance from the pen. Open flames are a big no-no, especially when working with celluloid, which is highly flammable. To be extra cautious, keep a bowl of water nearby in case of unexpected flare-ups.
"The most important tool in every repairer's toolbox is patience." - Richard Binder, Pen Restorer
Tools for Nib and Feed Work
Nib adjustments are where things can get tricky, so it’s best to proceed cautiously. For cleaning dried ink from the nib slit or carefully widening it to improve ink flow, 0.0015-inch brass shims or foil are incredibly handy. These tools slide through the slit easily without forcing the tines apart unevenly.
To inspect your work, a 10× to 20× jeweler's loupe is essential. Since about 70% of professional pen repairs involve nib adjustments, magnification helps ensure tine alignment before you proceed. As pen repair expert David Armstrong explains:
"Unless the tines are properly parallel first, nothing else will make it a smooth writer."
Once the nib is aligned, you can polish it to restore its shine and smoothness.
Polishing and Surface Care
Restoring the look of your pen is all about using the right materials. For plastic or metal parts, micro-mesh sheets with grits ranging from 3,200 to 12,000 are perfect for removing fine scratches and bringing back the shine. Always work from coarse to fine grits and keep the surface wet to prevent heat buildup.
When wiping or buffing, choose your materials carefully. 100% cotton rags, like the yellow ones found at auto parts stores, are gentle enough for celluloid and acrylic pens. Avoid synthetic fabrics, as they can scratch the surface. For metal trim and hardware, a Sunshine Cloth is a fantastic option. This jeweler’s polishing cloth removes tarnish and brightens metal with minimal abrasion.
If you’re working with metal parts, Simichrome polish is effective but should be used sparingly, especially on gold-plated pieces. Its mild abrasiveness can wear down the plating if overused, so a light touch is key.
sbb-itb-1dd4fe9
DIY Storage and Organization for Pens and Tools
Once your pens are clean and in top condition, the next step is keeping them organized and easy to access. The best part? You don’t need to spend a fortune - everyday household items can be transformed into practical and stylish storage solutions.
Repurposed Containers for Pen Storage
Empty tin cans and glass mason jars make excellent pen holders. Give them a personal touch with a bit of creativity - wrap them with twine or brush on some acrylic paint for a polished look. For a more structured option, grab some cardboard tubes (like the ones from paper towels or toilet paper rolls). Cut them to varying lengths and glue them inside a cereal box to create a tiered organizer. The shorter tubes are perfect for small items like nib units or converters, while the longer ones can hold cleaning brushes or other tools.
"A pen holder stand is more than just a storage item; it's a desk essential that keeps stationery organized while enhancing workspace decor." - Hands on Supply
You can also add cardboard dividers to a larger container to keep pens separate from tools. To protect against ink spills, seal paper-based organizers with a coat of Mod Podge. These simple steps not only keep your pens safe but also make your workspace more functional.
Soft Materials for Pen Protection
Materials like felt, fleece, or neoprene are perfect for protecting your pens from scratches. Line a drawer with felt to prevent pens from rolling into each other. If you need a portable solution, consider making a fabric roll with individual slots. This keeps each pen neatly separated and protected while on the go.
"A pencil roll is basically a rectangle of fabric with slots to hold each pencil, pen, or brush, that can be rolled up into a tube to be transported. The benefit of this system is that all my tools are laid out in front of me, allowing me to find the one I need right away." - Tess Needham
Keeping your pens safe is just one part of the equation. Next, let’s look at how to organize your maintenance tools for easy access.
Putting Together a Maintenance Kit
For organizing your cleaning and repair tools, a decorated cereal box can work wonders. Add cardboard dividers to create compartments for different items, such as brass nib flosser sheets, small sample vials for soaking nibs, blunt-tip syringes, and a jeweler's loupe. Group the tools by function - cleaning supplies in one section, workbench tools in another, and polishing materials in a third. This way, everything stays in its place and is easy to find when you need it.
| Repurposed Item | Best Use Case | Customization Tip |
|---|---|---|
| Tin Cans | Heavy desktop storage | Wrap in fabric or twine for a refined look |
| Glass Jars | Elegant display | Add ribbon or paint with acrylics for a pop of color |
| Fabric Scraps | Portable pen protection | Sew into a roll to keep pens separated |
| Cereal Boxes | Organizer base | Cut into shapes to hold tubes and tools |
| Paper Tubes | Tiered sorting | Use varying lengths for pens and smaller tools |
With these DIY ideas, you can create a storage system that’s both functional and visually appealing, all while making the most of items you already have at home.
Safety Tips and Best Practices for DIY Pen Maintenance
Taking care of your pen at home is simple and effective when done right. By following these safety tips, you can prevent accidental damage and keep your pen in excellent condition.
Safe Cleaning Agents and Materials
Stick to cool or lukewarm water for cleaning - hot water can weaken internal components and harm seals. For the exterior, use a soft, lint-free cloth and avoid pressing on the nib to maintain its alignment. After cleaning, check the nib and feed for any fibers that may have been left behind, especially if you use lower-quality paper that tends to shed. Keeping these precautions in mind can save you from unnecessary repairs.
Signs You Need a Professional Repair
Sometimes, even diligent cleaning and care aren’t enough to fix certain issues. Here are some signs that it’s time to consult a professional:
| Warning Sign | Likely Cause |
|---|---|
| Persistent skipping or slow starts after multiple flushes | Internal blockage or feed damage |
| Leaking after hot water exposure | Damaged internal seals |
| Visibly bent or splayed nib after forced writing | Structural damage needing professional tuning |
| Stubborn shimmer or waterproof ink residue | May require ultrasonic cleaning to protect the feed |
If your pen stops writing, start with a rinse and a short soak. If these basic steps don’t resolve the issue, it’s best to leave it to a professional. Recognizing these warning signs early can save your pen from more serious problems.
Setting Up a Regular Maintenance Routine
Consistency is key to keeping your pen in top shape. Flush your pen regularly, especially before switching inks. If you’re planning to store it for a while, make sure it’s thoroughly cleaned and dried to avoid dried ink buildup, which can lead to bigger issues down the road. With the cleaning tools and materials mentioned in this guide - like soft cloths and simple containers - you can easily establish a maintenance routine without needing any specialized equipment.
Conclusion
Taking care of your fountain pen doesn't mean you need to stock up on fancy tools or gadgets. As we've covered, basic cleaning, minor tweaks, and thoughtful storage can all be managed with everyday items like soft cloths, bulb syringes, cotton swabs, and small containers - things you probably already have lying around. The reward? Pens that write more smoothly, clog less often, and last longer with minimal effort.
However, it's important to know where to draw the line. DIY maintenance is fantastic for routine care, but it's not a fix-all. Problems like misaligned tines, cracks, or ongoing ink flow issues call for professional repair. When a simple cleaning doesn't work, it's better to leave it to the experts.
If you're new to fountain pen care, start small and practice on a pen you won't stress over. For example, Fountain Pen Revolution offers beginner-friendly sets starting at $35 and bundles from $29. These are perfect for learning the basics without worrying about damaging a pricey pen. They also stock practical accessories like pen stands and cases to help you stay organized - just the kind of tools that complement the maintenance tips shared in this guide.
Begin with one simple task: flush out a pen, clean a nib, or gather a few household items to create a maintenance kit. Building good habits doesn’t happen overnight, but it starts with small, manageable steps.
FAQs
How often should I flush my fountain pen?
To keep your fountain pen in top shape, flush it regularly based on how often you use it. If you're writing for over 2 hours daily, aim to flush it weekly. For moderate use, around 30 minutes to 2 hours daily, a bi-weekly flush should suffice. And, of course, always flush your pen when switching to a new ink color. Regular maintenance every few weeks helps prevent clogs and ensures your pen writes smoothly, staying dependable for years.
What’s the safest way to remove a stuck nib or section?
To safely remove a stuck nib or section, it's important to avoid using too much force, as this can damage your pen. If you're dealing with a stuck section, try using rubber-gripped pliers wrapped in microfiber or rubber to protect the pen's finish. Apply gentle, steady rotational pressure to loosen it. For a stuck nib and feed, you can use a reverse knockout method. This involves a flat-ended drill bit and a small hammer to carefully push the components out without causing harm.
When should I stop DIY and get a professional repair?
Regular cleaning and flushing can solve many fountain pen issues. However, if problems like inconsistent ink flow, skipping, or scratchiness continue despite your efforts, it might be time to consult a professional. For tasks requiring precision, like nib alignment, it's best to leave it to the experts unless you have the right tools and experience - errors can lead to irreversible damage. If you're eager to learn, start by practicing on inexpensive nibs to gain confidence. Companies like Fountain Pen Revolution provide budget-friendly tools that can make routine maintenance easier and help keep your pens in great condition.