

Most nib problems do not need grinding. In many cases, I’d check paper, ink, tine alignment, and flow before I touch any abrasive. That matters because even light smoothing removes tipping material, and once it’s gone, it’s gone.
Here’s the short version:
- I’d start by pinpointing the problem
- I’d use a 7x–12x loupe before making changes
- I’d keep tools simple: micromesh 8,000–12,000 grit, brass shims, flush tools, clean paper
- I’d practice on 3–5 cheap spare nibs, not a favorite pen
- I’d test on more than one paper and with a reliable medium-flow ink
- I’d smooth with only 3–5 light strokes at a time
- I’d stop the moment the nib writes well
A few facts stand out fast. The article limits beginner work to light smoothing, basic tine alignment, and simple flow fixes. It also treats coarse abrasives below 3,000 grit and long grinding sessions as high-risk moves. And it warns that a few extra passes can turn a fine nib into something closer to a broader line, or cause hard starts from baby bottom.
If I had to sum up the whole piece in one line, it would be this: diagnose first, practice on cheap nibs, smooth lightly, and test after every short pass.
| Tip | What I’d focus on | Main risk if skipped |
|---|---|---|
| 1 | Know the exact problem | Fixing the wrong thing |
| 2 | Use the right tools | Removing too much tipping |
| 3 | Set up clean light and a stable desk | Scratches, slips, lost parts |
| 4 | Practice on spare nibs | Ruining a pen I care about |
| 5 | Check flow and alignment first | Using abrasives when they aren’t needed |
| 6 | Smooth in short bursts | Over-smoothing and hard starts |
| 7 | Avoid beginner mistakes | Permanent nib damage |
If I were new to nib work, I’d treat this as a slow, low-pressure process, not a repair race.
How to smooth a scratchy fountain pen nib
sbb-itb-1dd4fe9
1. Know What You Are Actually Changing
When you work on a nib, you’re mostly changing four things: the tipping material, the tines, the slit, and the way the nib sits on the feed. Each one changes a different part of how the pen writes.
Change the tipping shape, and you change line width and smoothness. Move the tines, and you change ink flow. Change how the nib rests on the feed, and the pen can write wetter or drier. That’s why you want to figure out the problem before you touch any abrasive.
Even light smoothing removes tipping material. A few extra passes can turn a fine nib into something closer to a medium, or take a smooth tip and make it scratchy from certain angles. It doesn’t take much.
For beginners, the safer jobs are:
- tine alignment
- ink-flow tuning
- light smoothing
Other work - like grinding a stub, widening the slit, or bending a nib for flex - removes metal fast and can ruin the nib for good.
Test the nib in more than one direction, on different paper, and with another ink if you can. The symptoms matter. Scratchy upstrokes often point to tine misalignment. Skipping on copy paper may come from the paper texture, not nib damage. In other words, the way the nib misbehaves usually tells you whether it needs alignment, a flow fix, or nothing at all.
Use a 7x–12x loupe. Check for cracks near the breather hole, uneven tipping, or a slit that looks unusually wide. If you see twisted tines, chipped tipping, or a crack, replace the nib. Once you know what needs to change, gather only the tools for that one job.
2. Get the Right Tools for Nib Work
You don’t need much gear to get started. But what you choose matters a lot. The wrong tool can wear down tipping material faster than you think, and once that’s gone, it’s gone for good.
That’s why a small, focused kit is the best place to start. It helps you stay in control instead of getting in over your head.
For most beginners, the core setup includes:
- a 7x–12x loupe
- micromesh pads, 6,000–12,000 grit
- a few brass shims
- a small syringe or bulb
- smooth writing paper
- a soft microfiber cloth
Each tool has a clear job. Use the loupe to check tine alignment. Use micromesh for very light smoothing. Use brass shims to clean out the slit. And use a syringe or bulb to flush old ink and debris that may be blocking flow.
A non-permanent marker can help more than people expect. Mark the tipping surface before smoothing so you can see where the abrasive is making contact. If the ink wears off unevenly, that’s a sign your angle is off, and you can fix it before removing too much material.
Skip tools that are too harsh for beginner nib work, including:
- rotary tools
- coarse sandpaper below 3,000 grit
- files
- aggressive polishes
Those can take off tipping material fast, and not in a good way. Start with fine abrasives, work slowly, and add more tools only as your skill grows.
With your minimal kit ready, move to a clean, well-lit workspace.
3. Set Up a Clean, Well-Lit Workspace
With your tools ready, the next step is to get your workspace under control. Use bright, neutral-white light and place the lamp at an angle from the side. That side angle helps cut shadows, so it's easier to spot tine misalignment, micro-scratches, and uneven tipping without glare bouncing off the polished metal.
Work on a flat, stable desk and cover it with a microfiber towel or rubber mat. Keep paper towels and clean water close by. A light-colored surface also helps a lot, since small parts stand out better and are less likely to disappear on you.
It also helps to keep your setup tidy:
- Put tools in small, separate containers
- Store practice nibs in a labeled bag
- Keep your daily-use pen away from your spare parts
That simple habit can save you from grabbing a pen you care about when you only meant to work on a spare.
As you work, sit upright and rest your forearms on the desk. That gives your hand more support and helps you stay steady during fine adjustments.
Before each session, clean the area and remove any lint or dried ink between passes. Dust, fibers, and dried ink residue can get onto the nib and cause scratches you never meant to make, which adds wear before smoothing even starts. Once the space is clean, move to a spare nib before touching a pen you use every day.
4. Practice on Cheap or Spare Nibs First
Once your workspace is set, don’t start with your favorite pen. Nib work changes metal for good, so it’s smarter to learn on low-cost nibs first. Use your setup on a nib you can afford to test.
Steel nibs make good practice pieces. They resist wear, and they show your hand clearly. They also often come with small, everyday flaws, like slightly rough edges or uneven tine alignment. That means you get to work on the kinds of tuning problems you’re most likely to run into. Medium and broad steel nibs are the best size for practice because they usually have more tipping material. That gives you a bit more room to fix mistakes before you’ve removed too much.
You don’t need a huge pile of parts, either. A set of three to five low-cost practice nibs is enough to get started. Fountain Pen Revolution carries affordable pens and replacement nibs that work well for practice.
A simple way to stay focused is to give each practice nib just one job:
- one for smoothing (see our guide on how to smooth a scratchy nib)
- one for tine alignment
- one left untouched as a reference
That reference nib matters more than it may seem. It gives you a direct before-and-after point of comparison, so you can feel how each change affects flow and writing feel. Before you touch any abrasives, check flow and alignment first.
5. Check Ink Flow and Tine Alignment Before Using Abrasives
Use one of the spare nibs from the last step for this check. Start with flow and alignment. Save abrasives for later.
Flush the pen with lukewarm water. Then fill it with a reliable medium-flow ink, not shimmer ink or anything loaded with pigment. Write a full page on two paper types and watch for skipping, pale lines, and hard starts after the pen has been capped for a minute.
Next, check the tines. Under a bright lamp, look at the nib straight on. Both tines should meet evenly, with the slit centered. Then write slow left-to-right and right-to-left lines. If one direction feels scratchier, one tine is probably sitting a bit high.
If the scratchiness shows up only on upstrokes, or the skipping happens mostly on curves, that usually points to alignment or flow - not surface roughness. Affordable #6 steel nibs are great for practicing this kind of check. If the alignment looks good, the flow stays even, and the nib still feels rough in every direction, move to light abrasive work. Only then should you go on to light smoothing.
6. Use Light Smoothing Strokes and Stop Often to Test
If the tines are lined up and ink flow is even, use very light smoothing only. Think of this as a small tune-up, not a reshaping job. Use short figure-eight motions, side-to-side strokes, or soft circles, and keep the nib at the same angle you naturally use when writing.
The goal is to refine the tipping, not change its shape. Let the nib’s own weight do most of the work. Your hand should only guide it.
Use as few strokes as you can, then test right away. Make 3–5 strokes, stop, wipe the nib clean, and test on the same paper you normally use. Don’t wait until you’ve done a full round of smoothing. Check it after every few strokes. Also, stick with smooth paper. Rough paper can make a nib seem worse than it is.
A lot of nibs start to feel better after just a few passes.
After each short pass, check for:
- steady ink flow
- clean line starts
- no scratchiness in either direction
- enough feedback to keep your handwriting under control
There are a few signs you’ve gone too far. The nib may feel overly slick, the line may look less defined, or starts may become less consistent. Also watch for common nib issues like baby's bottom: a rounded tip that feels smooth but won’t start easily. If the nib already writes better, stop.
7. Avoid the Most Common First-Time Mistakes
Even if you do the prep work, a few beginner mistakes still trip people up.
The biggest one? Reaching for an abrasive before figuring out what's actually wrong. Most scratchy nibs don't need grinding. They need alignment. So check tine alignment with a loupe first.
Another smart move: practice on a cheap spare nib, not a pen that's pricey or means something to you.
Over-grinding is where things go sideways fast. Coarse abrasives, too much pressure, and pass after pass can strip tipping much faster than you think. And once that tipping is gone, it's gone.
The two habits that cause the most trouble are impatience and perfectionism. If you rush your test writing, you're more likely to over-correct. And if you chase a nib that feels perfectly glassy, you can take off too much tipping, especially on finer nibs where a bit of feedback is normal. Set one clear goal before you start, then stop when you hit it.
For a first try, skip the advanced stuff. Flex conversions and specialty grinds ask for more skill than most beginners have on day one. Light smoothing and small flow adjustments are the better place to start.
Use the table below to separate safer starter methods from riskier ones.
Quick Reference Table: Safer vs. Riskier Methods for Beginners
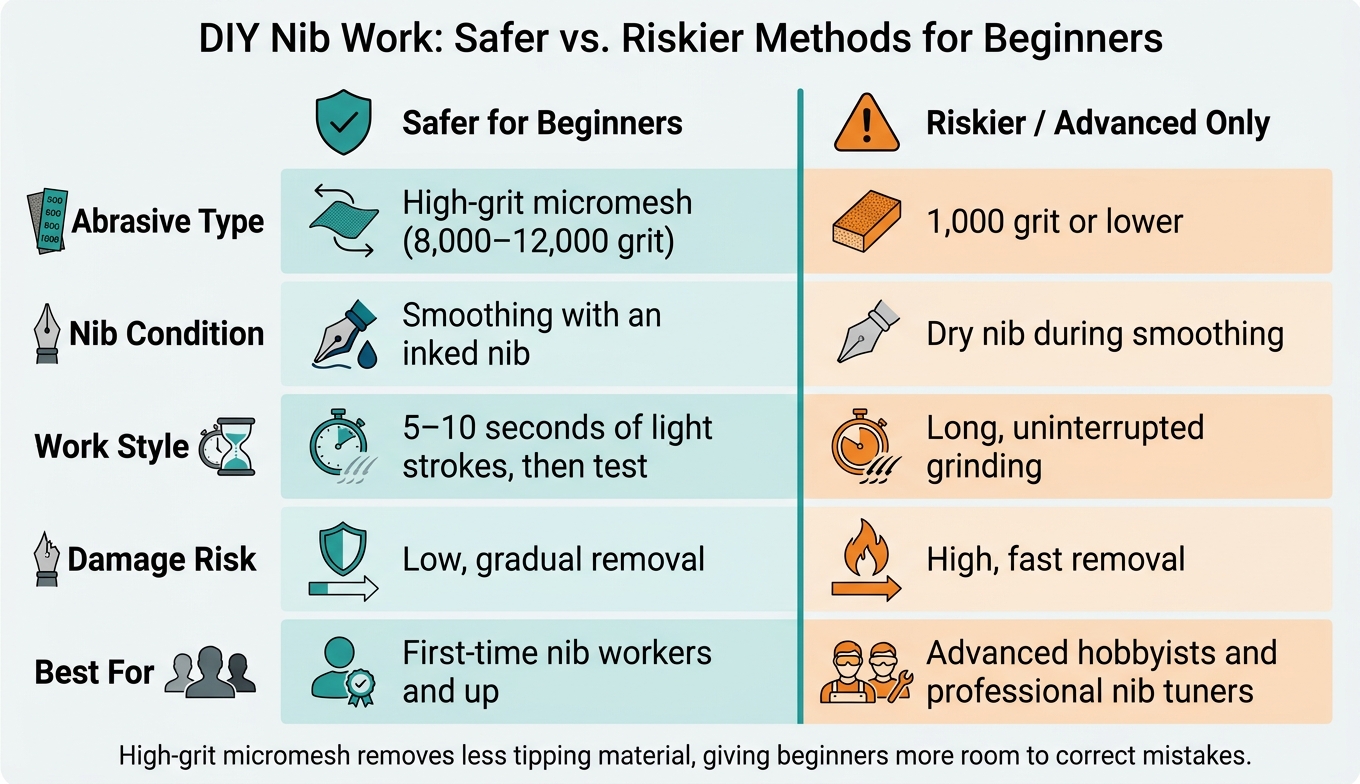
DIY Nib Work: Safer vs. Riskier Methods for Beginners
Use this table as a quick filter before you touch an abrasive. It gives you the fastest side-by-side look at options that are easier for beginners versus methods that can go wrong fast.
| Method | Safer for Beginners | Riskier / Advanced Only |
|---|---|---|
| Abrasive type | High-grit micromesh (8,000–12,000 grit) | 1,000 grit or lower |
| Nib condition | Smoothing with an inked nib | Dry nib during smoothing |
| Work style | 5–10 seconds of light strokes, then test | Long, uninterrupted grinding |
| Damage risk | Low, gradual removal | High, fast removal |
| Best for | First-time nib workers and up | Advanced hobbyists and professional nib tuners |
High-grit micromesh removes less tipping than low-grit sandpaper, which gives you more room to fix small errors. An inked nib also gives better feedback while you work and can help you avoid over-smoothing.
This is also the point where cheap practice pens and replacement nibs make sense. If you're just starting out, stick with the safer column and then go back to the alignment and smoothing steps above.
Conclusion
DIY nib work is something you can learn, but it pays off only if you slow down and stay patient. Check the problem first. Before you reach for any abrasive, look at tine alignment, ink flow, and your writing angle or fountain pen nib size. Once you know what’s wrong, use the gentlest tool that can fix it.
If smoothing is needed, stick with 8,000–12,000 grit micromesh and work in short bursts. Test the nib after each pass. The second it feels comfortable, stop. That urge to keep going for a “perfect” feel? That’s where people ruin nibs.
It also helps to practice on something you don’t care about. Build your touch on a spare nib before you work on a pen that matters. Fountain Pen Revolution sells affordable pens and replacement nibs, which makes practice a lot less stressful.
Some problems are better left to a pro. Persistent flow issues, physical damage, and specialty grinds should go to a nib specialist. A trained technician has the tools and hands-on skill for that kind of work.
Start small, test often, and stop as soon as the nib writes well.
FAQs
How do I tell if my nib needs smoothing or just alignment?
Check the nib first with a jeweler's loupe at 10x to 20x magnification. The tines should sit level and meet evenly at the tip. If one tine is higher than the other, the nib can feel scratchy, and smoothing by itself won't solve that.
Always fix alignment first. About 80% of performance issues come from uneven tines. Only use micromesh or Mylar if the tines are already aligned.
What should I practice on before working on a favorite pen?
Before working on a favorite pen, practice on inexpensive pens. That gives you room to build skill and confidence without worrying about damaging something you care about.
Low-cost options from Fountain Pen Revolution, along with models like the Jinhao 992 or C100, are good for early nib practice. You can use them to try basic adjustments such as tine alignment and smoothing without much pressure.
When should I stop and send a nib to a professional?
Stop and consult a professional if you’re not sure your skill level matches the job. It’s also smart to avoid DIY work on specialty grinds, flex adjustments, or rare and collectible pens. One small mistake there can cause permanent damage.
If you spot structural damage - like a bent tip, chipped tipping material, or cracks - stop right away. And once the nib starts performing better, stop there too. A lot of DIY fixes go wrong because people keep working on a nib after the problem is already improving.